The months have been flying by, and I’m only now realising it’s just 15 weeks until my debut cookbook Naturally Sassy; My recipes for an energised, healthy and happy you is launched and I’ll officially be a published author! I know this may seem like an age to wait for some of you, but when I started working on this project 84 weeks ago I never dreamed we’d be so close!
I thought this would be a great time to write a blog post all about the journey to this point, right from the very beginning – from my first meeting with the literary agent, to the writing process and finally sending it off to print! I’m sure some of you share the same passion for cookery and cookery writing as I do, so I hope this gives you an insight into how you can write a cookery book too.
STEP 1: WHAT’S YOUR BOOK ABOUT? WHAT’S YOUR USP?
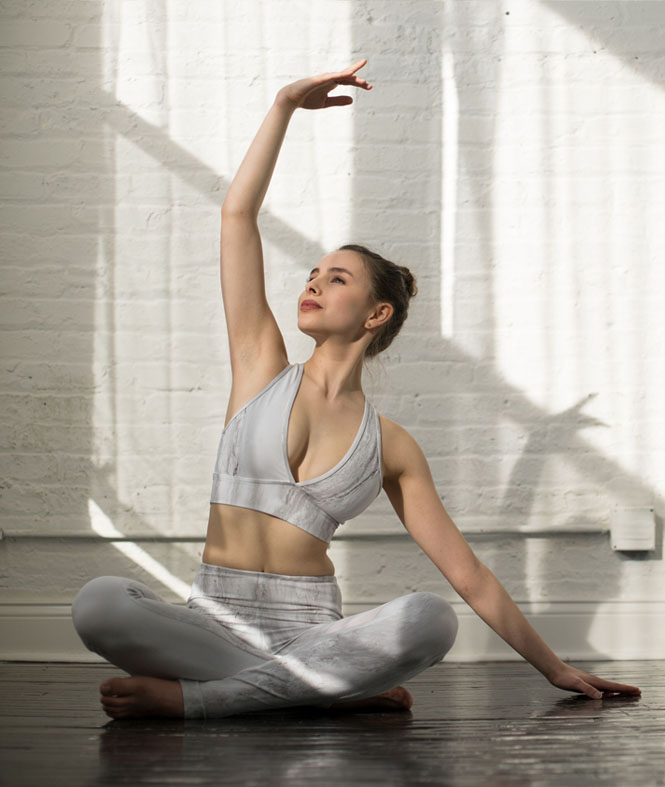
If you want to write a cookbook, you need to decide what you want your cookbook to focus on: desserts, healthy eating, raw food, Italian food…? There are millions of cookbooks out there, covering thousands of cuisines but what makes your book different? When I thought about this, I knew my personal USP was my passion to make healthy eating fun, affordable and easy. Food that anybody could enjoy, and use as a guide to a much healthier, happier life. As a ballet dancer I wanted to write from my personal experience as someone who has a very physical work load, and needs to not only eat for enjoyment but for nourishment. I knew where my unique stand point on nutrition was, and I ran (danced) with it!
STEP 2: THE PROPOSAL
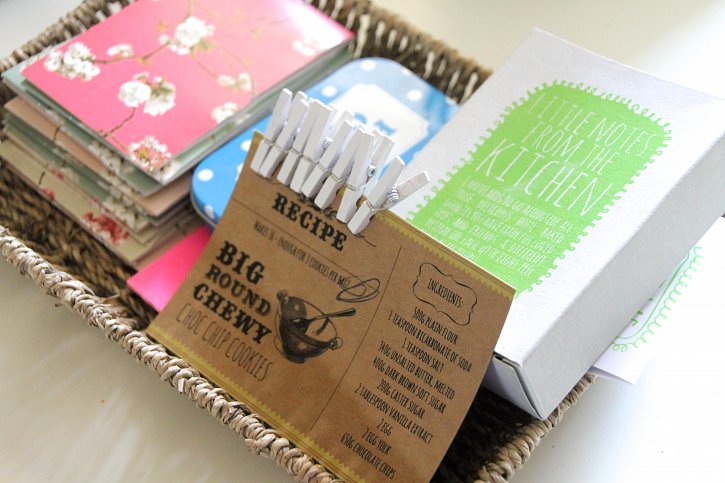
Write a book proposal telling the reader about yourself, the proposed book, the recipes and content your book will contain, your platform and social media/blog stats. I added a few pictures and recipes to give the reader a good idea of my style!
STEP 3: APPROACH A LITERARY AGENT!
I’m not sure how I knew about approaching a literary agent, but it certainly wasn’t something I had considered after I had decided on Step 1. I automatically assumed I could take my idea straight to publishers, oh how wrong I was! This step is vital and, if you’re lucky, very rewarding. Finding someone to support you through your book deal and help grow your idea is so important. Googling ‘top cookery literary agents’ is a good way to start, and after that just sending your proposal to as many of them as possible – the market is so crowded you’ll be lucky if you even get one response, but don’t be put put and be persistent! I was lucky enough to meet a few literary agents, and met my agent, Jamie, who believed whole heartedly in the potential of my ideas and helped me turn them into a fully fledged book.
STEP 4: APPROACHING PUBLISHERS
In my experience, after a few months (impatiently!) working with Jamie on my final proposal we sent it off to all the London publishers, and silently waited for feedback to come in. I had my eye on one publisher in particular from the start of this process, and waiting for their feedback made me a little too obsessed with checking my emails! After a week of bugging Jamie for any news, we started getting floods of emails – some positive, some not. After some publishers had dismissed the proposal because of having similar authors on their list we started setting up meetings with the interested ones.
STEP 5: MEETING PUBLISHERS
Meeting the publishers interested in the Naturally Sassy book was both scary and overwhelmingly exciting. I loved being able to get in the room and share my enthusiasm for the project in person, and see whereabouts they stood with regards to pursuing the book. Whilst negotiations went on, it was still fixed in my mind that one publisher in particular would provide the best home for my cookbook; Penguin Random House’s Ebury Press. A few weeks later I was sitting at the Good life Eatery with my Ebury Editor Laura and Agent Jamie, having brunch, discussing the plan for the weeks ahead and signing for the Naturally Sassy Cookbook. Hooray!
STEP 6: THE WRITING PROCESS
I signed for my cookbook in October and had 4 months to turn around 120 recipes, as well as page after page of content. Luckily I was well prepared with recipes. From April 2015 I had been writing the book over and over again in my head, so I had developed a really strong idea of what I wanted the final book to look like. I started by writing outlines of the book – what I wanted to include and where it would all be placed. From there I started to write, and write, and write! It was really hard getting started….I wrote the first line of the book over and over again. But eventually it started pouring out of me, and the introduction started to really come together. 10,000 words later and the introduction was in a really great place, and ready to be handed over to my editor.
STEP 7: RECIPE TESTING
So I’m a BIG foodie but nothing could have quite prepared me for the amount of food I’d be cooking in a pretty short amount of time. I was full pretty much 24/7, but all the healthier for it! When I wasn’t experimenting with a new untested recipe, I was going back over the old ones making sure my method worked and there were absolutely no glitches. My friends never left my flat, and I was filling endless tupperware boxes for them – I was a personal fast food restaurant for a good few weeks! Then, once I was well and truly happy with the recipes, I sent them over to friends and family and asked them to give them a go for themselves. Finally, when I had their seal of approval, the recipes were then sent off to my editor too.
STEP 8: COOKBOOK SHOOT
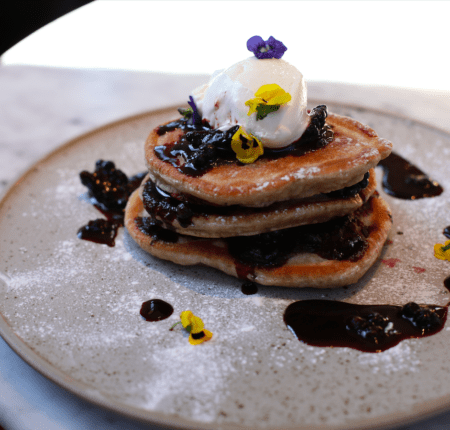
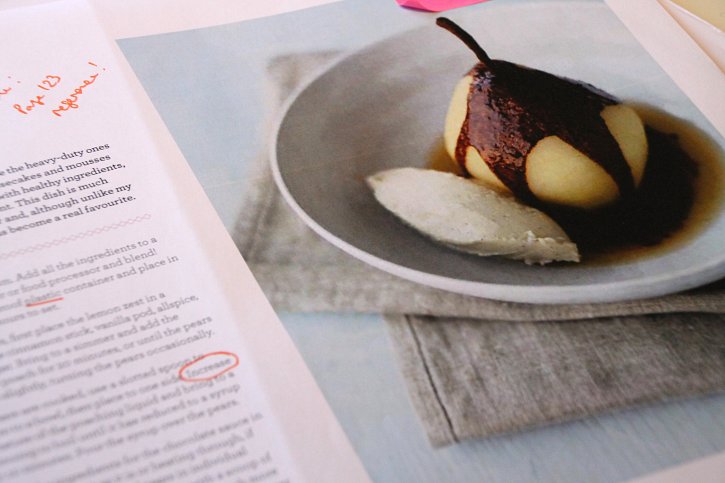
After the ground work’s done, it’s time for the most fun part – the cookbook photo-shoot! The team: Matt (photographer), Ellie (food stylist), Lydia (prop-stylist), Emma (designer) and Laura (editor) all met to go over the brief of the shoot; fun, fresh, natural, simple. This followed by the first shoot day, which was incredibly exciting. Lydia had brought a shop’s worth of incredible crockery and props, and Ellie was already done with three of my recipes when I arrived. For the first time in this whole process I was able to sit back and truly appreciate every step I’d taken to get to this point. The team were all ridiculously talented at what they do, and made every shoot day such fun. We spread the shoots throughout a few months to keep us all inspired every time we went back into the studio. For the cover shoot the team came down to my family home in the countryside, where we shot all the chapter openers and the Cover Shot! Despite my dog Banksy stealing the show (and the shots) – it was a truly wonderful day!
STEP 9: BEFORE THE BOOK LAUNCHES
All my recipe methods, content and introduction went into copy-editing and proofreading whilst the sales team at Ebury decided which cover reflects my message the best. After changing back and forth, we all agreed on the cover photo. It then went up for Amazon Pre-order which was incredibly surreal!
STEP 10: BEFORE RELEASE (WHERE I AM NOW!)
The book has gone to be printed, and we’re preparing for the release. I’m hoping to see a copy very soon, and in 15 weeks you all can too!
Pre-order the book so you get it on the release day August 6th here: http://po.st/CooPL4